

How To Cut Stems For Floral Foam: The Complete Guide To Fresh, Long-Lasting Arrangements
18 Sep 2025
How to Cut Stems for Floral Foam:
Whether you’re clipping one perfect rose or arranging a towering wedding centerpiece, how you cut and prepare stems for floral foam can mean the difference between petals sagging by nightfall or glowing fresh for days. Floral foam, often called OASIS foam, is the florist’s secret weapon. It acts like a soft green pin cushion that holds each stem firmly in place while locking in moisture—just as if you pressed flowers into cool, damp earth. This guide blends expert floral arranging techniques with easy, step-by-step instructions to help your arrangements last longer and look stunning.
Step 1: Pick the Right Floral Foam
The foundation of a beautiful flower arrangement starts with the right foam.
- Wet Floral Foam → Best for fresh flower arranging with roses, lilies, carnations, and more. It keeps stems hydrated and vibrant.
- Dry Floral Foam → Ideal for artificial or silk flower arrangements where no water is needed.
- Heavy-Duty Foam Blocks → Perfect for large round displays or dense arrangements that require extra support.
Pro Tip: Test a few brands of Oasis foam. Some keep stems upright and hydrated longer than others.
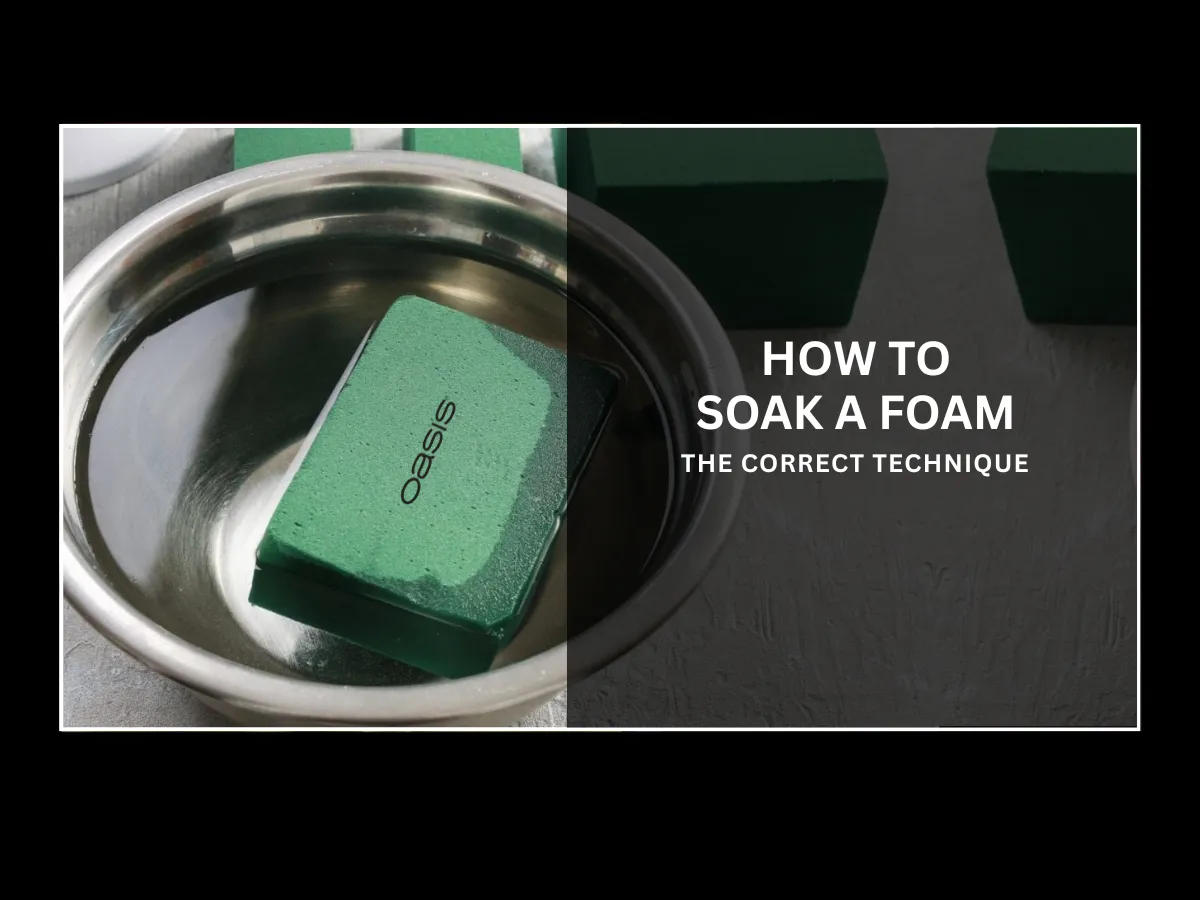
Step 2: Soak the Foam Properly
Hydration is key to long-lasting blooms.
- Fill a clean bucket with fresh, cool water.
- Place the floral foam block gently on the water’s surface. Do not press it down.
- Let it soak naturally for 15–30 minutes until it becomes heavy and dark green.
This method ensures even absorption—important whether you’re designing a wedding centerpiece, a boxed arrangement, or a simple sponge-based display.
Step 3: Choose the Right Cutting Tools
Sharp tools ensure clean cuts and help stems absorb water efficiently.
- Floral shears → Best for soft, tender stems.
- Pruning knife → Perfect for woody or thicker stems.
- Cutting mat → Protects your workspace from scratches.
Keep blades sharp so stems cut smoothly—like snapping a fresh carrot—helping flowers drink up water without struggle.
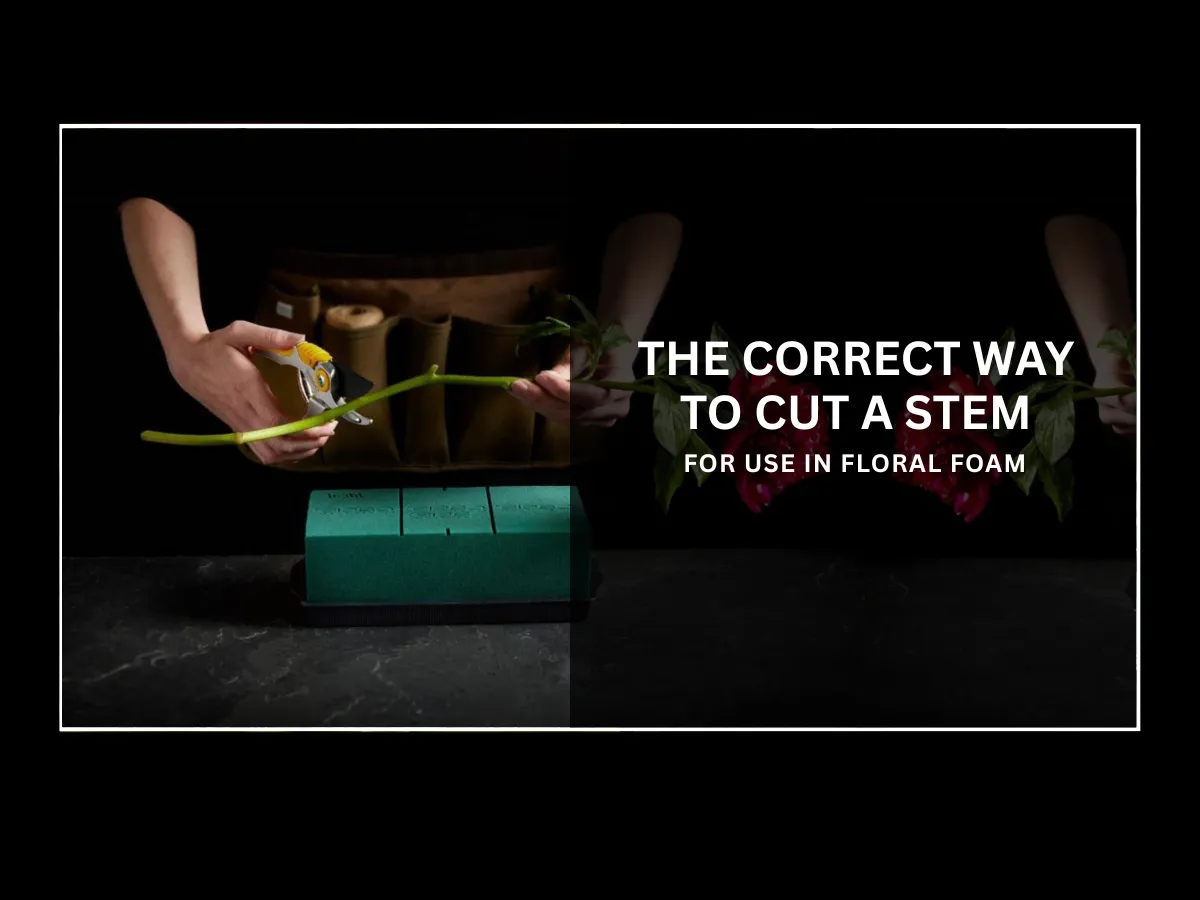
Step 4: Cut and Prepare the Stems
This step is critical for hydration and stability in foam arrangements.
- Cut stems at a 45-degree angle to maximize water absorption.
- Remove any leaves below the foam line—they can rot and encourage bacteria.
- Trim stems so they sit snugly in the foam without wobbling.
- Insert gently. Forcing stems can damage the foam or snap the stem.
This technique works for foam-based arrangements, sponge alternatives, and even no-foam designs using tape grids or chicken wire.
Step 5: Arrange the Flowers
Now comes the creative part—designing your floral display.
- Start with the first focal bloom, then build around it.
- Insert stems at slight angles for a natural, flowing look.
- Leave small gaps for water circulation inside the foam.
- Explore different arrangement styles:
- Tall and vertical for dramatic centerpieces.
- Round clusters for balanced displays.
- Mixed spreads for casual, organic looks.
Play with proportions and textures to make your design feel alive and effortless.
Step 6: Care for Your Arrangement
Keeping your flowers fresh requires simple daily habits.
- Check the foam daily—if it feels dry, add cool water.
- Re-cut stems every 2–3 days for better water intake.
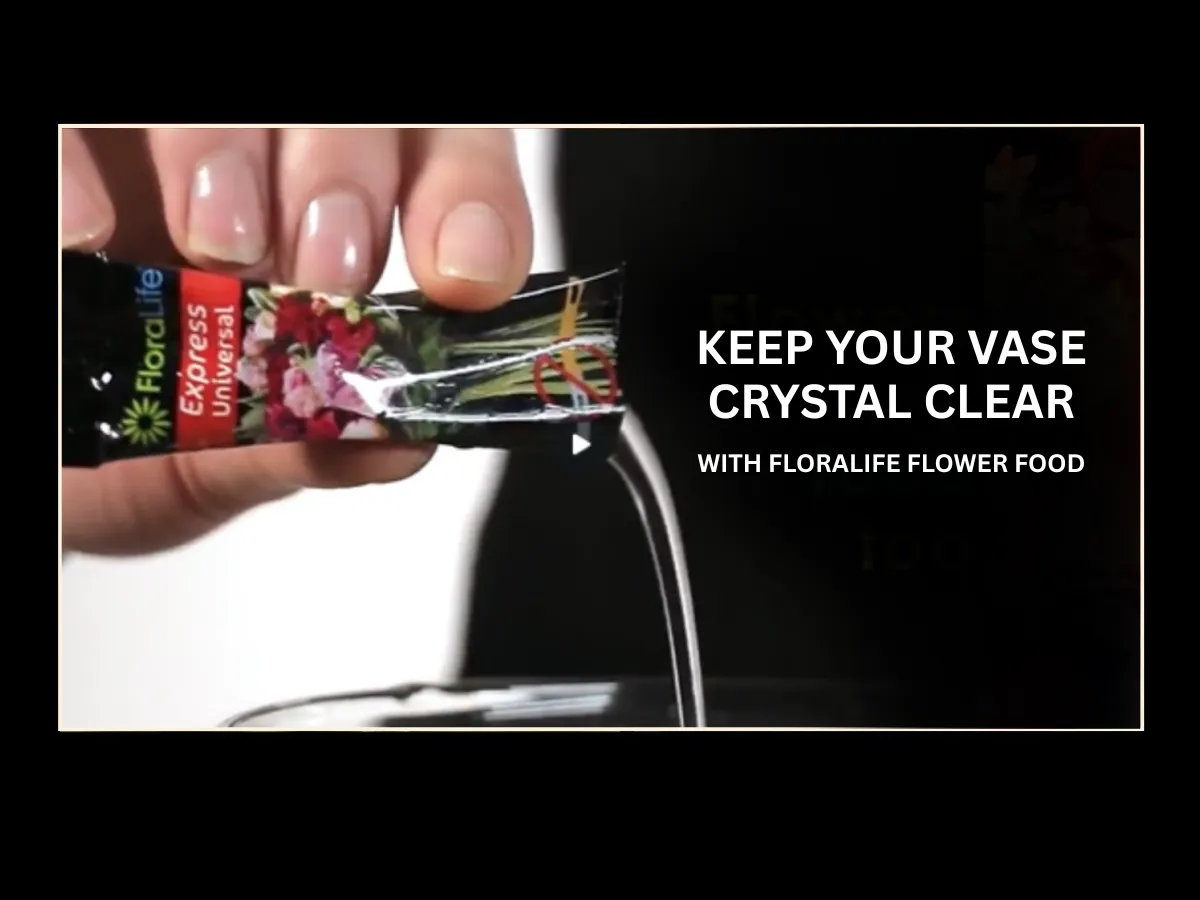
- Use flower food packets or organic plant food for extra freshness.
- For no-foam arrangements, change the vase water regularly.
With proper care, your OASIS-based arrangements will stay vibrant for days longer.
Common Mistakes to Avoid
- Don’t force stems—it bruises both stem and foam.
- Don’t skip soaking—dry spots prevent hydration.
- Don’t overcrowd—give flowers breathing room.
Quick FAQ
Q: How long do flowers last in floral foam?
With proper soaking, trimming, and daily care, flowers in Oasis floral foam can last 5–7 days.
Q: Can I reuse floral foam?
Wet floral foam is designed for one-time use. Reusing can lead to bacteria growth and poor water retention.
Q: What’s the difference between wet and dry foam?
Wet foam is for fresh flowers—it holds water. Dry foam is for artificial or silk flowers.
Q: Do I always need floral foam?
Not always. You can also use chicken wire, tape grids, or vases for no-foam flower arrangements.
Final Thoughts
Arranging flowers with floral foam combines both art and technique. By choosing the right foam, soaking it properly, cutting stems at the right angle, and caring for your arrangement daily, you’ll create displays that are not only beautiful but also long-lasting. Grab your foam, tools, and fresh blooms, and experiment with different designs—whether it’s an elegant wedding centerpiece, a vibrant table bouquet, or a simple at-home arrangement. With these tips, every stem you place will look as fresh as if it’s just been picked from the garden.


 Start Chat